This guide will walk you through installing Java 17 on Windows.
The Minecraft Launcher comes with its own Java installation, so this section is only relevant if you want to use the Fabric .jar based installer, or if you want to use the Minecraft Server .jar.
1. Check if Java Is Already Installed
To check if Java is already installed, you must first open the command prompt.
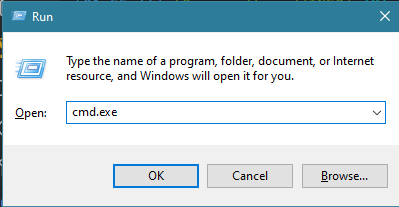
You can do this by pressing Win R and typing cmd.exe into the box that appears.

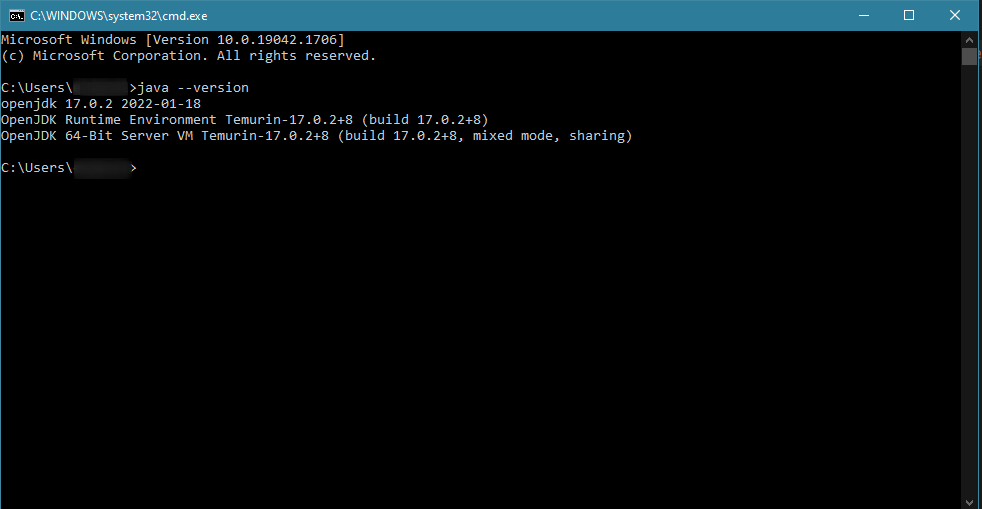
Once you have opened the command prompt, type java -version and press Enter.
If the command runs successfully, you will see something like this. If the command failed, proceed to the next step.

WARNING
To use the majority of modern Minecraft versions, you'll need at least Java 17 installed. If this command displays any version lower than 17, you'll need to update your existing Java installation.
2. Download the Java 17 Installer
To install Java 17, you'll need to download the installer from Adoptium.
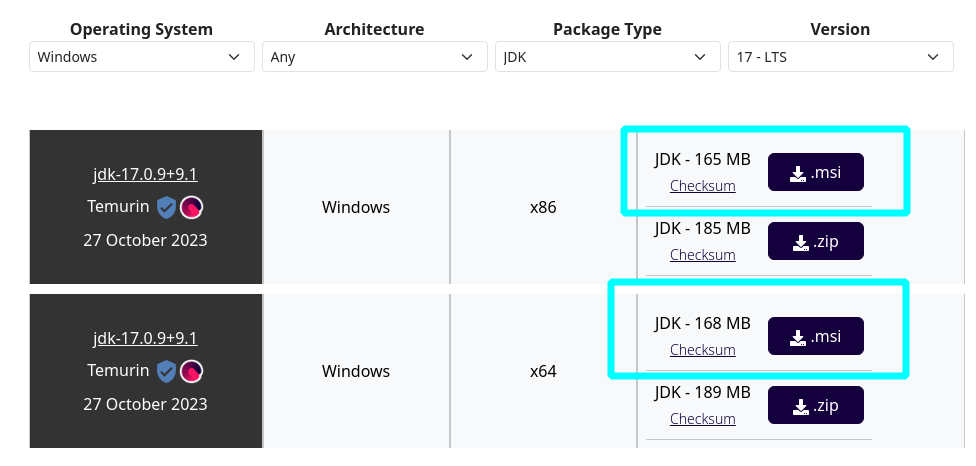
You'll want to download the Windows Installer (.msi) version:

You should choose x86 if you have a 32-bit operating system, or x64 if you have a 64-bit operating system.
The majority of modern computers will have a 64-bit operating system. If you are unsure, try using the 64-bit download.
3. Run the Installer!
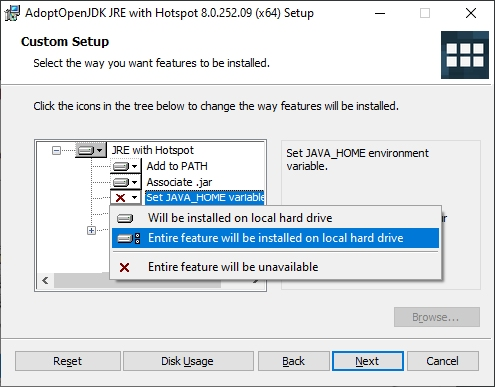
Follow the steps in the installer to install Java 17. When you reach this page, you should set the following features to "Entire feature will be installed on local hard drive":
Set JAVA_HOME environment variable- This will be added to your PATH.JavaSoft (Oracle) registry keys

Once you've done that, you can click Next and continue with the installation.
4. Verify That Java 17 Is Installed
Once the installation is complete, you can verify that Java 17 is installed by opening the command prompt again and typing java -version.
If the command runs successfully, you will see something like shown before, where the Java version is displayed:

If you encounter any issues, feel free to ask for help in the Fabric Discord in the #player-support channel.

