Preparando el archivo del sonido
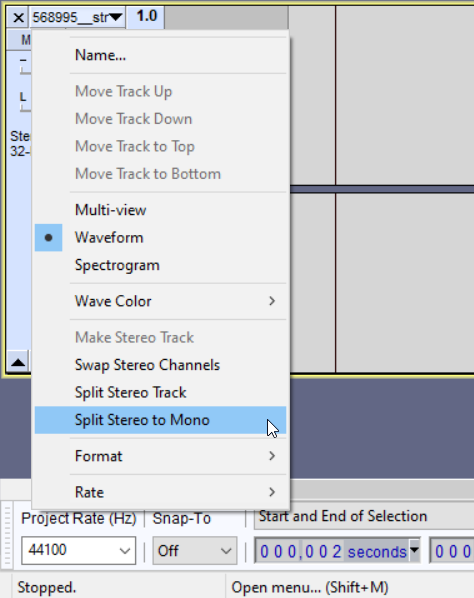
Tus archivos de sonido tienen que estar formateados de una manera específica. OGG Vorbis es un formato de contenedor abierto para datos multimedia, como audio, y es usado para los archivos de sonido de Minecraft. Para evitar problemas con la manera en que Minecraft maneja el distanciamiento, tu audio tiene que tener solo un canal (Mono).
Muchos software de DAWs (Estaciones de Trabajo de Audio Digitales) modernos pueden importar y exportar usando este formato de archivo. En el siguiente ejemplo el software gratuito y de fuente abierta "Audacity" será usado para traer el archivo de sonido al formato correcto, aunque cualquier otro DAW debería ser suficiente también.

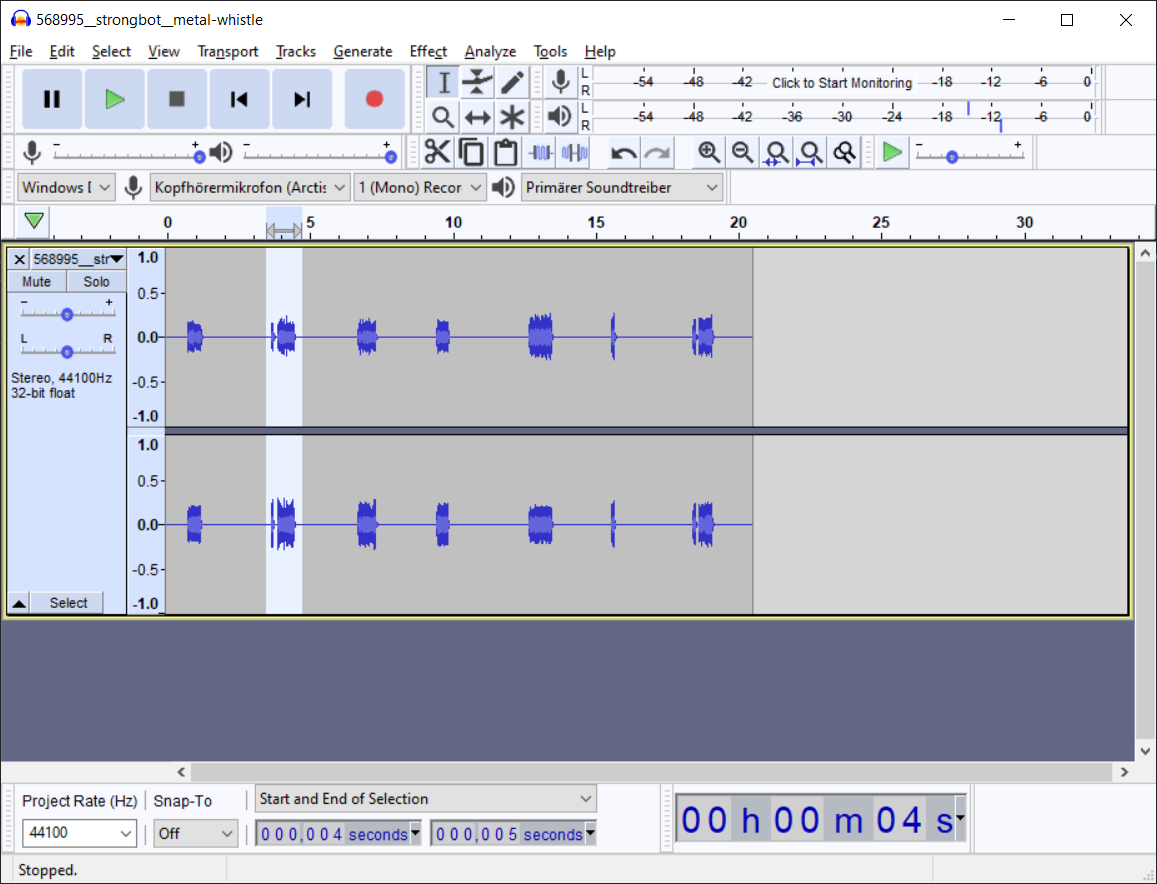
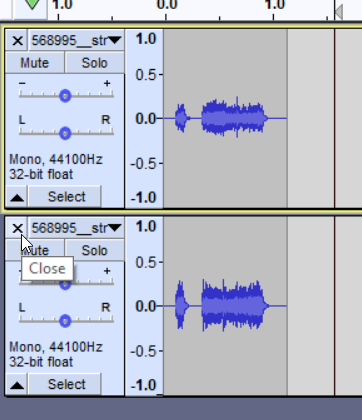
En este ejemplo, un sonido de un silbido es importado a Audacity. Actualmente está guardado como un archivo ".wav" y tiene dos canales de audio (Stereo). Edita el sonido a tu gusto y asegúrate de eliminar uno de los canales usando el menú desplegable encima del "track head" (cabeza de pista).


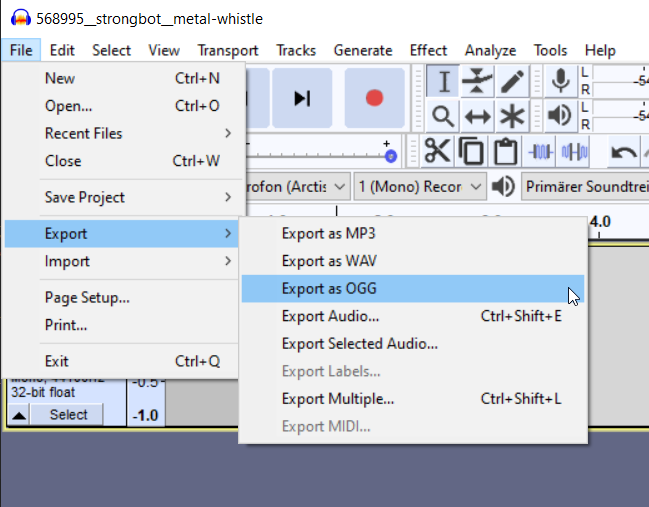
Al exportar o renderizar el archivo de audio, asegúrate de elegir el formato de archivo OGG. Algunos DAWs, como REAPER, pueden soportar múltiples capas de audio de OGG. En este caso, OGG Vorbis debería funcionar bien.

También ten en cuenta que los archivos de audio pueden aumentar el tamaño de tu mod drásticamente. Si es necesario, comprime el audio cuando lo edites y exportes el archivo para mantener el tamaño de tu producto final a un mínimo.
Cargando El Archivo de Audio
Agrega un nuevo folder resources/assets/<mod id here>/sounds para los sonidos en tu mod, y pon el archivo de audio exportado metal_whistle.ogg ahí.
Continúa creando el archivo resources/assets/<mod id here>/sounds.json si no existe todavía y agrega tu sonido a las entradas de sonido.
json
{
  "metal_whistle": {
    "subtitle": "sound.example-mod.metal_whistle",
    "sounds": ["example-mod:metal_whistle"]
  },
  "engine": {
    "subtitle": "sound.example-mod.engine",
    "sounds": ["example-mod:engine"]
  }
}
1
2
3
4
5
6
7
8
9
10
2
3
4
5
6
7
8
9
10
La entrada de subtítulo provee más contexto para el jugador. El nombre del subtítulo es usado en los archivos de lenguaje en el folder de resources/assets/<mod id here>/lang y serán mostrados si la opción de subtítulos en el juego es activada y el sonido personalizado está siendo reproducido.
Registrando el Sonido Personalizado
Para agregar el sonido personalizado al mod, registra un SoundEvent (Evento de Sonido) en la clase que implemente la interfaz ModInitializer.
java
Registry.register(Registries.SOUND_EVENT, Identifier.of(MOD_ID, "metal_whistle"),
        SoundEvent.of(Identifier.of(MOD_ID, "metal_whistle")));
1
2
2
Limpiando El Desorden
Dependiendo de cuantas entradas de Registro hayan, las cosas pueden enredarse rápidamente. Para evitar eso, podemos hacer uso de una nueva clase ayudante.
Agrega dos nuevos métodos a la nueva clase ayudante creada. Uno, que registre todos los sonidos y uno que es usado para inicializar esta clase en primer lugar. Después de eso, puedes agregar nuevos miembros estáticos de SoundEvent cómodamente como sea necesario.
java
public class CustomSounds {
	private CustomSounds() {
		// private empty constructor to avoid accidental instantiation
	}

	// ITEM_METAL_WHISTLE is the name of the custom sound event
	// and is called in the mod to use the custom sound
	public static final SoundEvent ITEM_METAL_WHISTLE = registerSound("metal_whistle");
	public static final SoundEvent ENGINE_LOOP = registerSound("engine");

	// actual registration of all the custom SoundEvents
	private static SoundEvent registerSound(String id) {
		Identifier identifier = Identifier.fromNamespaceAndPath(ExampleModSounds.MOD_ID, id);
		return Registry.register(BuiltInRegistries.SOUND_EVENT, identifier, SoundEvent.createVariableRangeEvent(identifier));
	}

	// This static method starts class initialization, which then initializes
	// the static class variables (e.g. ITEM_METAL_WHISTLE).
	public static void initialize() {
		ExampleModSounds.LOGGER.info("Registering " + ExampleModSounds.MOD_ID + " Sounds");
		// Technically this method can stay empty, but some developers like to notify
		// the console, that certain parts of the mod have been successfully initialized
	}
}
1
2
3
4
5
6
7
8
9
10
11
12
13
14
15
16
17
18
19
20
21
22
23
24
2
3
4
5
6
7
8
9
10
11
12
13
14
15
16
17
18
19
20
21
22
23
24
De esta manera, la clase implementadora de ModInitializer solo tiene que implementar una línea para registrar todos los SoundEvents personalizados.
java
public class ExampleModSounds implements ModInitializer {
	public static final String MOD_ID = ExampleMod.MOD_ID;
	public static final Logger LOGGER = ExampleMod.LOGGER;

	@Override
	public void onInitialize() {
		// This is the basic registering. Use a new class for registering sounds
		// instead, to keep the ModInitializer implementing class clean!
		Registry.register(BuiltInRegistries.SOUND_EVENT, Identifier.fromNamespaceAndPath(MOD_ID, "metal_whistle_simple"),
				SoundEvent.createVariableRangeEvent(Identifier.fromNamespaceAndPath(MOD_ID, "metal_whistle_simple")));

		// ... the cleaner approach.
		CustomSounds.initialize();
	}

	public static Identifier identifierOf(String path) {
		return Identifier.fromNamespaceAndPath(ExampleMod.MOD_ID, path);
	}
}
1
2
3
4
5
6
7
8
9
10
11
12
13
14
15
16
17
18
19
2
3
4
5
6
7
8
9
10
11
12
13
14
15
16
17
18
19
Usando el SoundEvent Personalizado
Use la clase ayudante para acceder el SoundEvent personalizado. Echa un vistazo a la página de Reproducir SoundEvents (Eventos de Sonido) para aprender a reproducir sonidos.

