Preparing the Audio File
Your audio files need to be formatted in a specific way. OGG Vorbis is an open container format for multimedia data, such as audio, and is used in case of Minecraft's sound files. To avoid problems with how Minecraft handles distancing, your audio needs to have only a single channel (Mono).
Many modern DAWs (Digital Audio Workstation) software can import and export using this file format. In the following example the free and open-source software "Audacity" will be used to bring the audio file into the right format, however any other DAW should suffice as well.

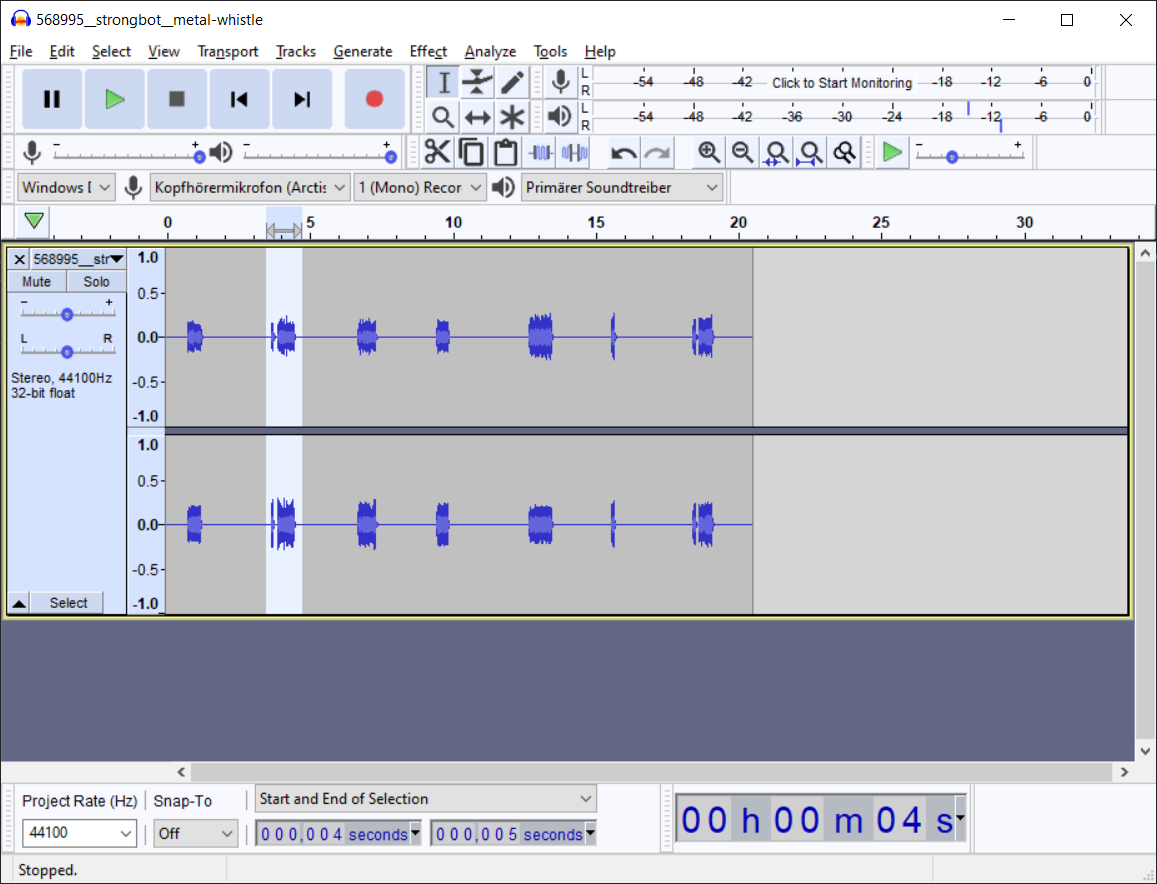
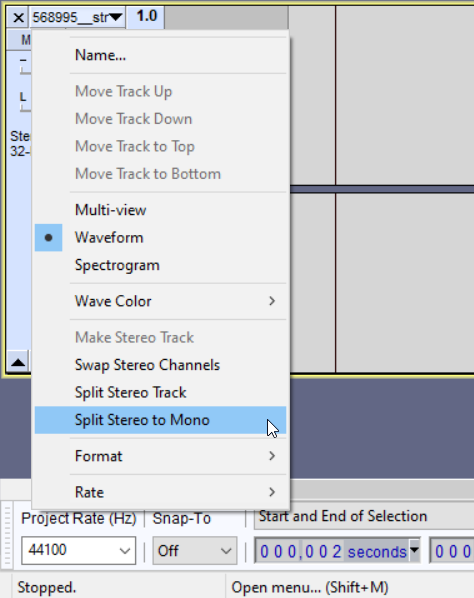
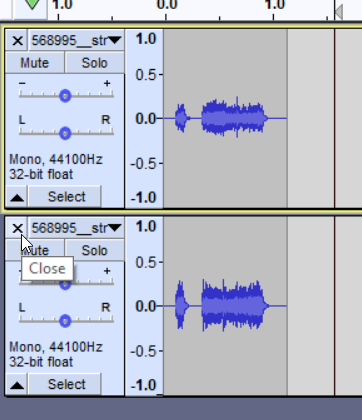
In this example, a sound of a whistle is imported into Audacity. It currently is saved as a .wav file and has two audio channels (Stereo). Edit the sound to your liking and make sure to delete one of the channels using the drop-down element at the top of the "track head".


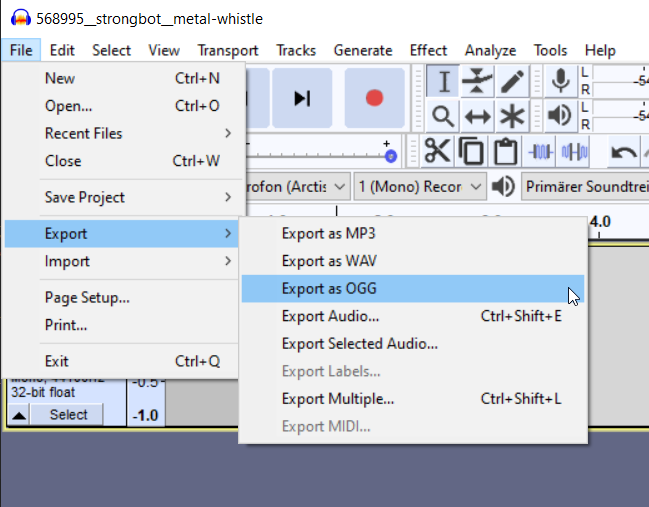
When exporting or rendering the audio file, make sure to choose the OGG file format. Some DAWs, like REAPER, might support multiple OGG audio layer formats. In this case OGG Vorbis should work just fine.

Also keep in mind that audio files can increase the file size of your mod drastically. If needed, compress the audio when editing and exporting the file to keep the file size of your finished product to a minimum.
Loading the Audio File
Add the new resources/assets/example-mod/sounds directory for the sounds in your mod, and put the exported audio file metal_whistle.ogg in there.
Continue with creating the resources/assets/example-mod/sounds.json file if it doesn't exist yet and add your sound to the sound entries.
json
{
  "metal_whistle": {
    "subtitle": "sound.example-mod.metal_whistle",
    "sounds": ["example-mod:metal_whistle"]
  },
  "engine": {
    "subtitle": "sound.example-mod.engine",
    "sounds": ["example-mod:engine"]
  }
}
1
2
3
4
5
6
7
8
9
10
2
3
4
5
6
7
8
9
10
The subtitle entry provides more context for the player. The subtitle name is used in the language files in the resources/assets/example-mod/lang directory and will be displayed if the in-game subtitle setting is turned on and this custom sound is being played.
Registering the Custom Sound
To add the custom sound to the mod, register a SoundEvent in your mod's initializer.
java
Registry.register(BuiltInRegistries.SOUND_EVENT, Identifier.fromNamespaceAndPath(MOD_ID, "metal_whistle"),
        SoundEvent.createVariableRangeEvent(Identifier.fromNamespaceAndPath(MOD_ID, "metal_whistle")));
1
2
2
Cleaning up the Mess
Depending on how many Registry entries there are, this can get messy quickly. To avoid that, we can make use of a new helper class.
Add two new methods to the newly created helper class. One, which registers all the sounds and one which is used to initialize this class in the first place. After that you can comfortably add new custom SoundEvent static class variables as needed.
java
public class CustomSounds {
	private CustomSounds() {
		// private empty constructor to avoid accidental instantiation
	}

	// ITEM_METAL_WHISTLE is the name of the custom sound event
	// and is called in the mod to use the custom sound
	public static final SoundEvent ITEM_METAL_WHISTLE = registerSound("metal_whistle");
	public static final SoundEvent ENGINE_LOOP = registerSound("engine");

	// actual registration of all the custom SoundEvents
	private static SoundEvent registerSound(String id) {
		Identifier identifier = Identifier.fromNamespaceAndPath(ExampleModSounds.MOD_ID, id);
		return Registry.register(BuiltInRegistries.SOUND_EVENT, identifier, SoundEvent.createVariableRangeEvent(identifier));
	}

	// This static method starts class initialization, which then initializes
	// the static class variables (e.g. ITEM_METAL_WHISTLE).
	public static void initialize() {
		ExampleModSounds.LOGGER.info("Registering " + ExampleModSounds.MOD_ID + " Sounds");
		// Technically this method can stay empty, but some developers like to notify
		// the console, that certain parts of the mod have been successfully initialized
	}
}
1
2
3
4
5
6
7
8
9
10
11
12
13
14
15
16
17
18
19
20
21
22
23
24
2
3
4
5
6
7
8
9
10
11
12
13
14
15
16
17
18
19
20
21
22
23
24
This way, the mod's initializer only needs to implement one line to register all custom SoundEvents.
java
public class ExampleModSounds implements ModInitializer {
	public static final String MOD_ID = ExampleMod.MOD_ID;
	public static final Logger LOGGER = ExampleMod.LOGGER;

	@Override
	public void onInitialize() {
		// This is the basic registering. Use a new class for registering sounds
		// instead, to keep the ModInitializer implementing class clean!
		Registry.register(BuiltInRegistries.SOUND_EVENT, Identifier.fromNamespaceAndPath(MOD_ID, "metal_whistle_simple"),
				SoundEvent.createVariableRangeEvent(Identifier.fromNamespaceAndPath(MOD_ID, "metal_whistle_simple")));

		// ... the cleaner approach.
		CustomSounds.initialize();
	}

	public static Identifier identifierOf(String path) {
		return Identifier.fromNamespaceAndPath(ExampleMod.MOD_ID, path);
	}
}
1
2
3
4
5
6
7
8
9
10
11
12
13
14
15
16
17
18
19
2
3
4
5
6
7
8
9
10
11
12
13
14
15
16
17
18
19
Using the Custom SoundEvent
Use the helper class to access the custom SoundEvent. Check out the Playing Sounds page to learn how to play sounds.

