
Testing Automatizzato 26.1.2
Una guida per scrivere test automatici con Fabric Loader JUnit.
Questa pagina spiega come scrivere codice che testi parti della tua mod automaticamente. Ci sono due modi per testare la tua mod automaticamente: unit test con Fabric Loader JUnit o test nel gioco con il framework Gametest di Minecraft.
Gli unit test dovrebbero essere usato per testare le componenti del tuo codice, come i metodi e le classi ausiliarie, mentre test nel gioco avviano un client e un server Minecraft reali per eseguire i tuoi test, il che li rende appropriati per testare funzionalità e gameplay.
Unit Testing
Poiché il modding in Minecraft si affida a strumenti di modifica del byte-code da eseguire come i Mixin, aggiungere e usare JUnit normalmente non funzionerebbe. Questo è il motivo per cui Fabric fornisce Fabric Loader JUnit, un plugin JUnit che attiva lo unit testing in Minecraft.
Configurare Fabric Loader JUnit
Anzitutto, dobbiamo aggiungere Fabric Loader JUnit all'ambiente di sviluppo. Aggiungi il seguente blocco di dipendenze al tuo build.gradle:
gradle
testImplementation "net.fabricmc:fabric-loader-junit:${project.loader_version}"Poi, dobbiamo informare Gradle su come usare Fabric Loader JUnit per il testing. Puoi fare ciò aggiungendo il codice seguente al tuo build.gradle:
gradle
test {
	useJUnitPlatform()
}Scrivere Test
Appena ricaricato Gradle, sei pronto a scrivere test.
Questi test si scrivono proprio come altri test JUnit regolari, con un po' di configurazione aggiuntiva se vuoi accedere a classi che dipendono dalle registry, come ItemStack. Se JUnit ti è familiare, puoi saltare a Impostare le Registry.
Impostare la Tua Prima Classe di Test
I test si scrivono nella cartella src/test/java.
Una convenzione per i nomi è quella di rispecchiare la struttura del package della classe che stai testando. Per esempio, per testare src/main/java/com/example/docs/codec/BeanType.java, dovresti creare la classe src/test/java/com/example/docs/codec/BeanTypeTest.java. Nota che abbiamo aggiunto Test alla fine del nome della classe. Questo ti permette anche di accedere facilmente a metodi e attributi privati al package.
Un'altra convenzione è avere un package test, quindi src/test/java/com/example/docs/test/codec/BeanTypeTest.java. Questo previene alcuni problemi dovuti all'uso dello stesso package se usi i moduli Java.
Dopo aver creato la classe di test, usa ⌘/CTRL+N per aprire il menu Generate. Seleziona Test e comincia a scrivere il nome del tuo metodo, che di solito inizia con test. Premi Invio quando hai fatto. Per altri trucchi riguardo all'ambiente di sviluppo, vedi Trucchi Riguardanti l'IDE.
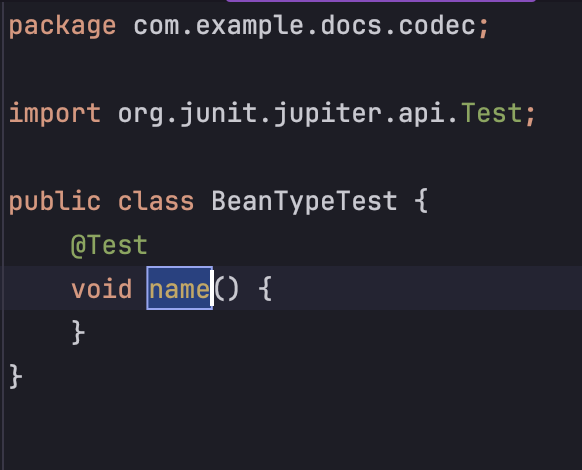
Puoi ovviamente scrivere la firma del metodo manualmente, e qualsiasi istanza del metodo senza parametri e come tipo restituito void sarà identificato come metodo di test. Dovresti alla fine avere il seguente:
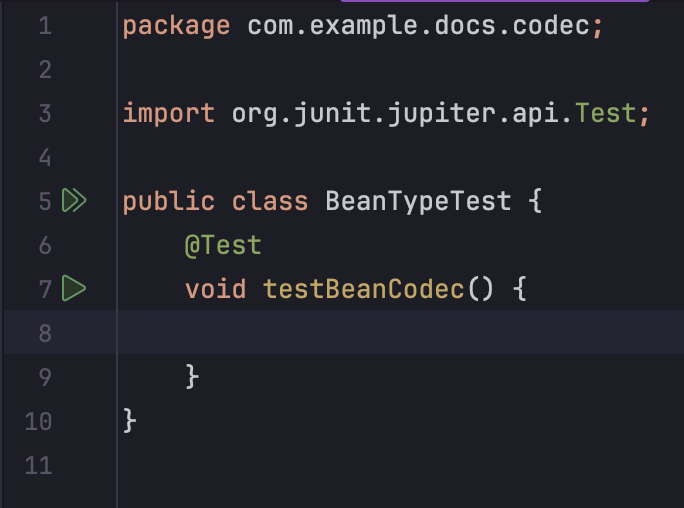
Nota gli indicatori a freccia verde nel margine: puoi facilmente eseguire un test cliccandoci sopra. In alternativa, i tuoi test si eseguiranno in automatico ad ogni build, incluse le build di CI come GitHub Actions. Se stai usando GitHub Actions, non dimenticare di leggere Configurare le GitHub Actions.
Ora è il tempo di scrivere il tuo codice di test effettivo. Puoi assicurare condizioni con org.junit.jupiter.api.Assertions. Dai un'occhiata ai test seguenti:
java
public class BeanTypeTest {
	private static final Gson GSON = new GsonBuilder().create();

	@BeforeAll
	static void beforeAll() {
		BeanTypes.register();
	}

	@Test
	void testBeanCodec() {
		StringyBean expectedBean = new StringyBean("This bean is stringy!");
		Bean actualBean = Bean.BEAN_CODEC.parse(JsonOps.INSTANCE, GSON.fromJson("{\"type\":\"example-mod:stringy_bean\",\"stringy_string\":\"This bean is stringy!\"}", JsonObject.class)).getOrThrow();

		Assertions.assertInstanceOf(StringyBean.class, actualBean);
		Assertions.assertEquals(expectedBean.getType(), actualBean.getType());
		Assertions.assertEquals(expectedBean.getStringyString(), ((StringyBean) actualBean).getStringyString());
	}

	@Test
	void testDiamondItemStack() {
		// I know this isn't related to beans, but I need an example :)
		ItemStackTemplate diamondStack = new ItemStackTemplate(Items.DIAMOND, 65);

		Assertions.assertTrue(diamondStack.is(Items.DIAMOND));
		Assertions.assertEquals(65, diamondStack.count());
	}
}Per una spiegazione di cosa fa questo codice, consulta la pagina Codec.
Impostare le Registry
Ottimo, il primo test è funzionato! Ma aspetta, il secondo test è fallito? Nei log, otteniamo uno dei seguenti errori.
log
java.lang.ExceptionInInitializerError
	at net.minecraft.item.ItemStack.<clinit>(ItemStack.java:94)
	at com.example.docs.codec.BeanTypeTest.testBeanCodec(BeanTypeTest.java:20)
	at java.base/java.lang.reflect.Method.invoke(Method.java:580)
	at java.base/java.util.ArrayList.forEach(ArrayList.java:1596)
	at java.base/java.util.ArrayList.forEach(ArrayList.java:1596)
Caused by: java.lang.IllegalArgumentException: Not bootstrapped (called from registry ResourceKey[minecraft:root / minecraft:game_event])
	at net.minecraft.Bootstrap.createNotBootstrappedException(Bootstrap.java:118)
	at net.minecraft.Bootstrap.ensureBootstrapped(Bootstrap.java:111)
	at net.minecraft.registry.Registries.create(Registries.java:238)
	at net.minecraft.registry.Registries.create(Registries.java:229)
	at net.minecraft.registry.Registries.<clinit>(Registries.java:139)
	... 5 more

Not bootstrapped (called from registry ResourceKey[minecraft:root / minecraft:game_event])
java.lang.IllegalArgumentException: Not bootstrapped (called from registry ResourceKey[minecraft:root / minecraft:game_event])
	at net.minecraft.Bootstrap.createNotBootstrappedException(Bootstrap.java:118)
	at net.minecraft.Bootstrap.ensureBootstrapped(Bootstrap.java:111)
	at net.minecraft.registry.Registries.create(Registries.java:238)
	at net.minecraft.registry.Registries.create(Registries.java:229)
	at net.minecraft.registry.Registries.<clinit>(Registries.java:139)
	at net.minecraft.item.ItemStack.<clinit>(ItemStack.java:94)
	at com.example.docs.codec.BeanTypeTest.testBeanCodec(BeanTypeTest.java:20)
	at java.base/java.lang.reflect.Method.invoke(Method.java:580)
	at java.base/java.util.ArrayList.forEach(ArrayList.java:1596)
at java.base/java.util.ArrayList.forEach(ArrayList.java:1596)Questo è perché stiamo provando ad accedere alla registry o a una classe che dipende su queste (o, in casi rari, dipende su altre classi Minecraft come SharedConstants), ma Minecraft non è stato inizializzato. Dobbiamo solo inizializzarlo un po' perché funzionino le registry. Ti basta aggiungere il codice seguente all'inizio del tuo metodo beforeAll.
java
SharedConstants.tryDetectVersion();
Bootstrap.bootStrap();Configurare le GitHub Actions
INFO
Questa sezione suppone che stia usando il workflow GitHub Action standard incluso con la mod di esempio e con la mod modello.
I tuoi test ora verranno eseguiti ad ogni build, incluse quelle di fornitori CI come GitHub Actions. E se una build fallisce? Dovrai caricare i log come artifact per permetterci di vedere i report del test.
Aggiungi questo al tuo file .github/workflows/build.yaml, sotto alla fase ./gradlew build.
yaml
- name: Store reports
  if: failure()
  uses: actions/upload-artifact@v4
  with:
    name: reports
    path: |
      **/build/reports/
**/build/test-results/Test di Gioco
Minecraft fornisce il framework di test del gioco per testare le funzionalità lato server. Fabric fornisce inoltre test di gioco client per testare le funzionalità lato client, simili a un test end-to-end.
Impostazione dei test di gioco con Fabric Loom
Entrambi i test di gioco server e client possono essere impostati manualmente o con Fabric Loom. Questa guida utilizzerà Loom.
Per aggiungere test di gioco alla tua mod, aggiungi quanto segue al tuo build.gradle:
gradle
fabricApi {
	configureTests {
		createSourceSet = true
		modId = "example-mod-test-${project.name}"
		enableGameTests = true // Default is true
		enableClientGameTests = true // Default is true
		eula = true // By setting this to true, you agree to the Minecraft EULA.
	}
}Per vedere tutte le opzioni disponibili, vedere la documentazione di Loom sui test.
Impostazione della directory di test del gioco
INFO
Questa sezione è necessaria solo se hai abilitato createSourceSet, opzione consigliata. Naturalmente, puoi fare ciò che vuoi con Gradle, ma dovrai farlo da solo.
Se hai abilitato createSourceSet come nell'esempio sopra, il tuo gametest sarà in un set sorgente separato con un file fabric.mod.json separato. Il nome predefinito del modulo è gametest. Crea un nuovo fabric.mod.json in src/gametest/resources/ come mostrato:
json
{
  "schemaVersion": 1,
  "id": "example-mod-test",
  "version": "1.0.0",
  "name": "Example mod",
  "icon": "assets/example-mod/icon.png",
  "environment": "*",
  "entrypoints": {
    "fabric-gametest": [
      "com.example.docs.ExampleModGameTest",
      "com.example.docs.entity.EntityAttributesGameTest"
    ],
    "fabric-client-gametest": ["com.example.docs.ExampleModClientGameTest"]
  }
}Si noti che fabric.mod.json si aspetta un test di gioco del server in src/gametest/java/com/example/docs/ExampleModGameTest e un test di gioco del client in src/gametest/java/com/example/docs/ExampleModClientGameTest.
Scrittura di test di gioco
Ora puoi creare test di gioco per server e client nella directory src/gametest/java. Ecco un esempio basilare per ciascuno:
java
package com.example.docs;

import java.lang.reflect.Method;

import net.minecraft.gametest.framework.GameTestHelper;
import net.minecraft.world.level.block.Blocks;

import net.fabricmc.fabric.api.gametest.v1.CustomTestMethodInvoker;
import net.fabricmc.fabric.api.gametest.v1.GameTest;

public class ExampleModGameTest implements CustomTestMethodInvoker {
	@GameTest
	public void test(GameTestHelper context) {
		context.assertBlockPresent(Blocks.AIR, 0, 0, 0);
		context.succeed();
	}

	@Override
	public void invokeTestMethod(GameTestHelper context, Method method) throws ReflectiveOperationException {
		context.setBlock(0, 0, 0, Blocks.AIR);
		method.invoke(this, context);
	}
}java
package com.example.docs;

import net.fabricmc.fabric.api.client.gametest.v1.FabricClientGameTest;
import net.fabricmc.fabric.api.client.gametest.v1.context.ClientGameTestContext;
import net.fabricmc.fabric.api.client.gametest.v1.context.TestSingleplayerContext;

@SuppressWarnings("UnstableApiUsage")
public class ExampleModClientGameTest implements FabricClientGameTest {
	@Override
	public void runTest(ClientGameTestContext context) {
		try (TestSingleplayerContext singleplayer = context.worldBuilder().create()) {
			singleplayer.getClientLevel().waitForChunksRender();
			context.takeScreenshot("example-mod-singleplayer-test");
		}
	}
}Per maggiori informazioni, consultare i rispettivi Javadoc nella Fabric API.
Eseguire i test di gioco
I test di gioco del server saranno eseguiti automaticamente come parte dell'attività Gradle build. Puoi eseguire i test di gioco del client con l'attività Gradle runClientGameTest.
Eseguire i test di gioco su GitHub Actions
Le workflow GitHub Action che già eseguono build, eseguiranno anche i test di gioco del server in automatico. Per eseguire i test di gioco del client tramite GitHub Actions, aggiungi lo snippet seguente al tuo file build.gradle, e il job seguente alla workflow. Lo snippet di Gradle eseguirà i test di gioco del client tramite le attività eseguibili in production di Loom, e il job eseguirà quell'attività nel sistema CI.
WARNING
Per ora, i test di gioco potrebbero fallire su GitHub Actions a causa di un errore nella sincronizzazione della rete. Se incontrassi questo errore, basta aggiungere -Dfabric.client.gametest.disableNetworkSynchronizer=true agli argomenti della JVM nella dichiarazione della tua attività eseguibile in production.
gradle
dependencies {
  productionRuntimeMods "net.fabricmc.fabric-api:fabric-api:${fabricApiVersion}"
}

tasks.register("runProductionClientGameTest", net.fabricmc.loom.task.prod.ClientProductionRunTask) {
	jvmArgs.add("-Dfabric.client.gametest")
	// Whether to use XVFB to run the game, using a virtual framebuffer. This is useful for headless CI environments.
	// Defaults to true only on Linux and when the "CI" environment variable is set.
	// XVFB must be installed, on Debian-based systems you can install it with: `apt install xvfb`
	useXVFB = true
}yaml
client_game_test:
  runs-on: ubuntu-24.04
  steps:
    - uses: actions/checkout@v4
    - uses: actions/setup-java@v4
      with:
        distribution: temurin
        java-version: 25
    - run: ./gradlew runProductionClientGameTest
    - if: always()
      uses: actions/upload-artifact@v4
      with:
        path: build/run/clientGameTest/screenshots