
Automated Testing 26.1.2
A guide to writing automatic tests with Fabric Loader JUnit.
This page explains how to write code to automatically test parts of your mod. There are two ways to automatically test your mod: unit tests with Fabric Loader JUnit or game tests with the Gametest framework from Minecraft.
Unit tests should be used to test components of your code, such as methods and helper classes, while game tests spin up an actual Minecraft client and server to run your tests, which makes it suitable for testing features and gameplay.
Unit Testing
Since Minecraft modding relies on runtime byte-code modification tools such as Mixin, simply adding and using JUnit normally would not work. That's why Fabric provides Fabric Loader JUnit, a JUnit plugin that enables unit testing in Minecraft.
Setting up Fabric Loader JUnit
First, we need to add Fabric Loader JUnit to the development environment. Add the following to your dependencies block in your build.gradle:
gradle
testImplementation "net.fabricmc:fabric-loader-junit:${project.loader_version}"Then, we need to tell Gradle to use Fabric Loader JUnit for testing. You can do so by adding the following code to your build.gradle:
gradle
test {
	useJUnitPlatform()
}Writing Tests
Once you reload Gradle, you're now ready to write tests.
These tests are written just like regular JUnit tests, with a bit of additional setup if you want to access any registry-dependent class, such as ItemStack. If you're comfortable with JUnit, you can skip to Setting Up Registries.
Setting Up Your First Test Class
Tests are written in the src/test/java directory.
One naming convention is to mirror the package structure of the class you are testing. For example, to test src/main/java/com/example/docs/codec/BeanType.java, you'd create a class at src/test/java/com/example/docs/codec/BeanTypeTest.java. Notice how we added Test to the end of the class name. This also allows you to easily access package-private methods and fields.
Another naming convention is to have a test package, such as src/test/java/com/example/docs/test/codec/BeanTypeTest.java. This prevents some problems that may arise with using the same package if you use Java modules.
After creating the test class, use ⌘/CTRL+N to bring up the Generate menu. Select Test and start typing your method name, usually starting with test. Press ENTER when you're done. For more tips and tricks on using the IDE, see IDE Tips and Tricks.
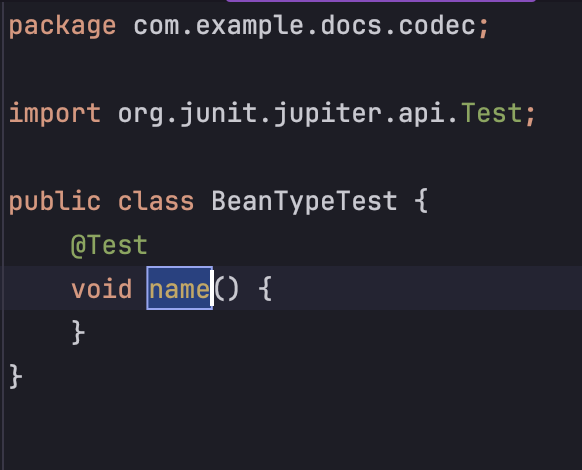
You can, of course, write the method signature by hand, and any instance method with no parameters and a void return type will be identified as a test method. You should end up with the following:
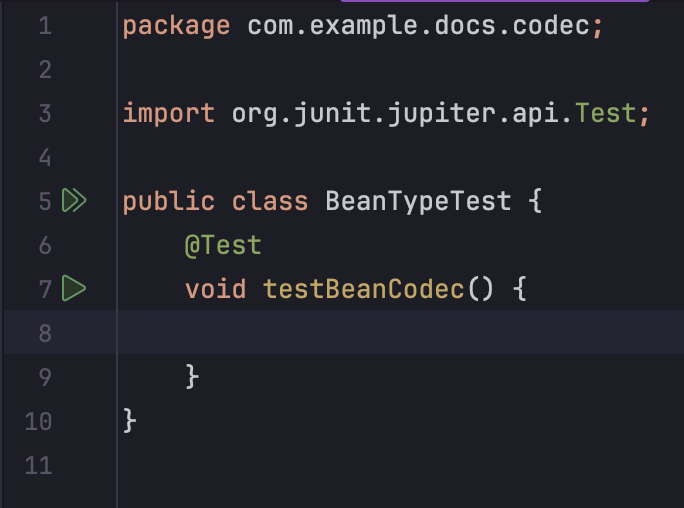
Notice the green arrow indicators in the gutter: you can easily run a test by clicking them. Alternately, your tests will run automatically on every build, including CI builds such as GitHub Actions. If you're using GitHub Actions, don't forget to read Setting Up GitHub Actions.
Now, it's time to write your actual test code. You can assert conditions using org.junit.jupiter.api.Assertions. Check out the following test:
java
public class BeanTypeTest {
	private static final Gson GSON = new GsonBuilder().create();

	@BeforeAll
	static void beforeAll() {
		BeanTypes.register();
	}

	@Test
	void testBeanCodec() {
		StringyBean expectedBean = new StringyBean("This bean is stringy!");
		Bean actualBean = Bean.BEAN_CODEC.parse(JsonOps.INSTANCE, GSON.fromJson("{\"type\":\"example-mod:stringy_bean\",\"stringy_string\":\"This bean is stringy!\"}", JsonObject.class)).getOrThrow();

		Assertions.assertInstanceOf(StringyBean.class, actualBean);
		Assertions.assertEquals(expectedBean.getType(), actualBean.getType());
		Assertions.assertEquals(expectedBean.getStringyString(), ((StringyBean) actualBean).getStringyString());
	}

	@Test
	void testDiamondItemStack() {
		// I know this isn't related to beans, but I need an example :)
		ItemStackTemplate diamondStack = new ItemStackTemplate(Items.DIAMOND, 65);

		Assertions.assertTrue(diamondStack.is(Items.DIAMOND));
		Assertions.assertEquals(65, diamondStack.count());
	}
}For an explanation of what this code actually does, see Codecs.
Setting Up Registries
Great, the first test worked! But wait, the second test failed? In the logs, we get one of the following errors.
log
java.lang.ExceptionInInitializerError
	at net.minecraft.item.ItemStack.<clinit>(ItemStack.java:94)
	at com.example.docs.codec.BeanTypeTest.testBeanCodec(BeanTypeTest.java:20)
	at java.base/java.lang.reflect.Method.invoke(Method.java:580)
	at java.base/java.util.ArrayList.forEach(ArrayList.java:1596)
	at java.base/java.util.ArrayList.forEach(ArrayList.java:1596)
Caused by: java.lang.IllegalArgumentException: Not bootstrapped (called from registry ResourceKey[minecraft:root / minecraft:game_event])
	at net.minecraft.Bootstrap.createNotBootstrappedException(Bootstrap.java:118)
	at net.minecraft.Bootstrap.ensureBootstrapped(Bootstrap.java:111)
	at net.minecraft.registry.Registries.create(Registries.java:238)
	at net.minecraft.registry.Registries.create(Registries.java:229)
	at net.minecraft.registry.Registries.<clinit>(Registries.java:139)
	... 5 more

Not bootstrapped (called from registry ResourceKey[minecraft:root / minecraft:game_event])
java.lang.IllegalArgumentException: Not bootstrapped (called from registry ResourceKey[minecraft:root / minecraft:game_event])
	at net.minecraft.Bootstrap.createNotBootstrappedException(Bootstrap.java:118)
	at net.minecraft.Bootstrap.ensureBootstrapped(Bootstrap.java:111)
	at net.minecraft.registry.Registries.create(Registries.java:238)
	at net.minecraft.registry.Registries.create(Registries.java:229)
	at net.minecraft.registry.Registries.<clinit>(Registries.java:139)
	at net.minecraft.item.ItemStack.<clinit>(ItemStack.java:94)
	at com.example.docs.codec.BeanTypeTest.testBeanCodec(BeanTypeTest.java:20)
	at java.base/java.lang.reflect.Method.invoke(Method.java:580)
	at java.base/java.util.ArrayList.forEach(ArrayList.java:1596)
at java.base/java.util.ArrayList.forEach(ArrayList.java:1596)This is because we're trying to access the registry or a class that depends on the registry (or, in rare cases, depends on other Minecraft classes such as SharedConstants), but Minecraft has not been initialized. We just need to initialize it a little bit to have registries working. Simply add the following code to the beginning of your beforeAll method.
java
SharedConstants.tryDetectVersion();
Bootstrap.bootStrap();Setting Up GitHub Actions
INFO
This section assumes that you are using the standard GitHub Action workflow included with the example mod and with the mod template.
Your tests will now run on every build, including those by CI providers such as GitHub Actions. But what if a build fails? We need to upload the logs as an artifact so we can view the test reports.
Add this to your .github/workflows/build.yaml file, below the ./gradlew build step.
yaml
- name: Store reports
  if: failure()
  uses: actions/upload-artifact@v4
  with:
    name: reports
    path: |
      **/build/reports/
**/build/test-results/Game Tests
Minecraft provides the game test framework for testing server-side features. Fabric additionally provides client game tests for testing client-side features, similar to an end-to-end test.
Setting up Game Tests with Fabric Loom
Both server and client game tests can be set up manually or with Fabric Loom. This guide will use Loom.
To add game tests to your mod, add the following to your build.gradle:
gradle
fabricApi {
	configureTests {
		createSourceSet = true
		modId = "example-mod-test-${project.name}"
		enableGameTests = true // Default is true
		enableClientGameTests = true // Default is true
		eula = true // By setting this to true, you agree to the Minecraft EULA.
	}
}To see all available options, see the Loom documentation on tests.
Setting up Game Test Directory
INFO
You only need this section if you enabled createSourceSet, which is recommended. You can, of course, do your own Gradle magic, but you'll be on your own.
If you enabled createSourceSet like the example above, your gametest will be in a separate source set with a separate fabric.mod.json. The module name defaults to gametest. Create a new fabric.mod.json in src/gametest/resources/ as shown:
json
{
  "schemaVersion": 1,
  "id": "example-mod-test",
  "version": "1.0.0",
  "name": "Example mod",
  "icon": "assets/example-mod/icon.png",
  "environment": "*",
  "entrypoints": {
    "fabric-gametest": [
      "com.example.docs.ExampleModGameTest",
      "com.example.docs.entity.EntityAttributesGameTest"
    ],
    "fabric-client-gametest": ["com.example.docs.ExampleModClientGameTest"]
  }
}Note that this fabric.mod.json expects a server game test at src/gametest/java/com/example/docs/ExampleModGameTest, and a client game test at src/gametest/java/com/example/docs/ExampleModClientGameTest.
Writing Game Tests
You can now create server and client game tests in the src/gametest/java directory. Here is a basic example for each:
java
package com.example.docs;

import java.lang.reflect.Method;

import net.minecraft.gametest.framework.GameTestHelper;
import net.minecraft.world.level.block.Blocks;

import net.fabricmc.fabric.api.gametest.v1.CustomTestMethodInvoker;
import net.fabricmc.fabric.api.gametest.v1.GameTest;

public class ExampleModGameTest implements CustomTestMethodInvoker {
	@GameTest
	public void test(GameTestHelper context) {
		context.assertBlockPresent(Blocks.AIR, 0, 0, 0);
		context.succeed();
	}

	@Override
	public void invokeTestMethod(GameTestHelper context, Method method) throws ReflectiveOperationException {
		context.setBlock(0, 0, 0, Blocks.AIR);
		method.invoke(this, context);
	}
}java
package com.example.docs;

import net.fabricmc.fabric.api.client.gametest.v1.FabricClientGameTest;
import net.fabricmc.fabric.api.client.gametest.v1.context.ClientGameTestContext;
import net.fabricmc.fabric.api.client.gametest.v1.context.TestSingleplayerContext;

@SuppressWarnings("UnstableApiUsage")
public class ExampleModClientGameTest implements FabricClientGameTest {
	@Override
	public void runTest(ClientGameTestContext context) {
		try (TestSingleplayerContext singleplayer = context.worldBuilder().create()) {
			singleplayer.getClientLevel().waitForChunksRender();
			context.takeScreenshot("example-mod-singleplayer-test");
		}
	}
}See the respective Javadocs in Fabric API for more info.
Running Game Tests
Server game tests will be run automatically with the build Gradle task. You can run client game tests with the runClientGameTest Gradle task.
Run Game Tests on GitHub Actions
Existing GitHub Action workflows using build will run server game tests automatically. To run client game tests with GitHub Actions, add the following snippet to your build.gradle and the following job to your workflow. The Gradle snippet will run client game tests using Loom's production run tasks, and the job will execute the production run task in the CI.
WARNING
Currently, game test may fail on GitHub Actions due to an error in the network synchronizer. If you encounter this error, you can add -Dfabric.client.gametest.disableNetworkSynchronizer=true to the JVM args in your production run task declaration.
gradle
dependencies {
  productionRuntimeMods "net.fabricmc.fabric-api:fabric-api:${fabricApiVersion}"
}

tasks.register("runProductionClientGameTest", net.fabricmc.loom.task.prod.ClientProductionRunTask) {
	jvmArgs.add("-Dfabric.client.gametest")
	// Whether to use XVFB to run the game, using a virtual framebuffer. This is useful for headless CI environments.
	// Defaults to true only on Linux and when the "CI" environment variable is set.
	// XVFB must be installed, on Debian-based systems you can install it with: `apt install xvfb`
	useXVFB = true
}yaml
client_game_test:
  runs-on: ubuntu-24.04
  steps:
    - uses: actions/checkout@v4
    - uses: actions/setup-java@v4
      with:
        distribution: temurin
        java-version: 25
    - run: ./gradlew runProductionClientGameTest
    - if: always()
      uses: actions/upload-artifact@v4
      with:
        path: build/run/clientGameTest/screenshots