
自动化测试 26.1.2
使用 Fabric Loader JUnit 写自动化测试的指南。
此页面解释了如何在你的模组中编写自动化测试。 有两种方法自动化测试你的模组:使用 Fabric Loader JUnit 进行单元测试,或使用 Minecraft 游戏测试框架进行游戏内测试。
单元测试用于测试你代码中的组件,比如方法和工具类;游戏内测试则启动 Minecraft 客户端与服务端来运行你的测试,适用于测试功能和游玩过程。
单元测试
由于 Minecraft 模组运行依赖于运行时字节码修改工具比如 mixin,仅仅添加并使用 JUnit 一般不会生效。 这就是为什么 Fabric 提供了 Fabric Loader JUnit,一个针对 Minecraft 模组进行单元测试的 JUnit 插件。
配置 Fabric Loader JUnit
首先,我们需要将 Fabric Loader JUnit 添加到开发环境。 将以下依赖添加到你的 build.gradle:
gradle
testImplementation "net.fabricmc:fabric-loader-junit:${project.loader_version}"然后,我们需要告诉 Gradle 使用 Fabric Loader JUnit 来测试。 你可以通过将以下代码添加到 build.gradle 来做到这件事:
gradle
test {
	useJUnitPlatform()
}编写测试
重新加载 Gradle 后,现在就可以编写测试了。
这些测试的编写方式与常规 JUnit 测试相同,如果你想访问任何依赖于注册表的类(例如ItemStack),则需要进行一些额外的设置。 如果对 JUnit 比较熟悉,那么可以跳至设置注册表。
设置你的第一个测试类
测试编写于 src/test/java 目录下。
一种命名约定是镜像你正在测试的类的包结构。 例如,要测试 src/main/java/com/example/docs/codec/BeanType.java,应在 src/test/java/com/example/docs/codec/BeanTypeTest.java 创建一个类。 注意我们是如何将 Test 加入到类名称最后的。 这还允许你轻松访问包范围内私有(package-private)的方法和字段。
另一个命名约定是有一个 test 包,例如 src/test/java/com/example/docs/test/codec/BeanTypeTest.java。 如果你使用 Java 模块,这可以避免在使用相同包时可能出现的一些问题。
创建测试类后,使用 ⌘/CTRL+N 调出生成菜单。 选择测试并开始输入方法名称,通常以 test 开头。 完成时请按下 ENTER 键。 有关使用 IDE 的更多提示和技巧,请参阅 IDE 提示和技巧。
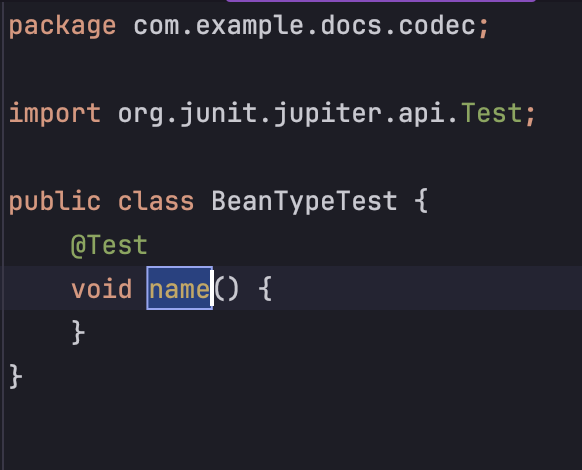
当然,你可以手写方法签名,任何没有参数且返回类型为 void 的实例方法都将被标识为测试方法。 你应该以这样结尾:
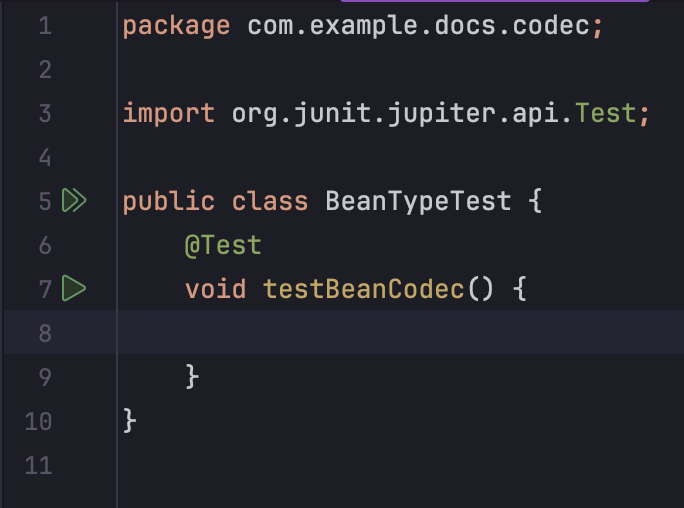
注意侧边栏中的绿色箭头指示——可以简单地点击来运行测试。 或者,你的测试将在每次构建时自动运行,包括 GitHub Actions 等 CI 构建。 如果你正在使用 GitHub Actions,请不要忘记阅读设置 GitHub Actions。
现在,该编写您的实测代码了。 你可以使用 org.junit.jupiter.api.Assertions 断言条件。 检查以下测试:
java
public class BeanTypeTest {
	private static final Gson GSON = new GsonBuilder().create();

	@BeforeAll
	static void beforeAll() {
		BeanTypes.register();
	}

	@Test
	void testBeanCodec() {
		StringyBean expectedBean = new StringyBean("This bean is stringy!");
		Bean actualBean = Bean.BEAN_CODEC.parse(JsonOps.INSTANCE, GSON.fromJson("{\"type\":\"example-mod:stringy_bean\",\"stringy_string\":\"This bean is stringy!\"}", JsonObject.class)).getOrThrow();

		Assertions.assertInstanceOf(StringyBean.class, actualBean);
		Assertions.assertEquals(expectedBean.getType(), actualBean.getType());
		Assertions.assertEquals(expectedBean.getStringyString(), ((StringyBean) actualBean).getStringyString());
	}

	@Test
	void testDiamondItemStack() {
		// I know this isn't related to beans, but I need an example :)
		ItemStackTemplate diamondStack = new ItemStackTemplate(Items.DIAMOND, 65);

		Assertions.assertTrue(diamondStack.is(Items.DIAMOND));
		Assertions.assertEquals(65, diamondStack.count());
	}
}有关此代码实际作用的解释,请参阅 Codec。
设置注册表
很好,第一个测试运行了! 但是稍等,第二个测试失败了? 在日志文件中,我们得到了以下错误。
log
java.lang.ExceptionInInitializerError
	at net.minecraft.item.ItemStack.<clinit>(ItemStack.java:94)
	at com.example.docs.codec.BeanTypeTest.testBeanCodec(BeanTypeTest.java:20)
	at java.base/java.lang.reflect.Method.invoke(Method.java:580)
	at java.base/java.util.ArrayList.forEach(ArrayList.java:1596)
	at java.base/java.util.ArrayList.forEach(ArrayList.java:1596)
Caused by: java.lang.IllegalArgumentException: Not bootstrapped (called from registry ResourceKey[minecraft:root / minecraft:game_event])
	at net.minecraft.Bootstrap.createNotBootstrappedException(Bootstrap.java:118)
	at net.minecraft.Bootstrap.ensureBootstrapped(Bootstrap.java:111)
	at net.minecraft.registry.Registries.create(Registries.java:238)
	at net.minecraft.registry.Registries.create(Registries.java:229)
	at net.minecraft.registry.Registries.<clinit>(Registries.java:139)
	... 5 more

Not bootstrapped (called from registry ResourceKey[minecraft:root / minecraft:game_event])
java.lang.IllegalArgumentException: Not bootstrapped (called from registry ResourceKey[minecraft:root / minecraft:game_event])
	at net.minecraft.Bootstrap.createNotBootstrappedException(Bootstrap.java:118)
	at net.minecraft.Bootstrap.ensureBootstrapped(Bootstrap.java:111)
	at net.minecraft.registry.Registries.create(Registries.java:238)
	at net.minecraft.registry.Registries.create(Registries.java:229)
	at net.minecraft.registry.Registries.<clinit>(Registries.java:139)
	at net.minecraft.item.ItemStack.<clinit>(ItemStack.java:94)
	at com.example.docs.codec.BeanTypeTest.testBeanCodec(BeanTypeTest.java:20)
	at java.base/java.lang.reflect.Method.invoke(Method.java:580)
	at java.base/java.util.ArrayList.forEach(ArrayList.java:1596)
at java.base/java.util.ArrayList.forEach(ArrayList.java:1596)这是因为我们正在尝试访问注册表或依赖于注册表的类(或者,在极少数情况下,依赖于其他 Minecraft 类,如 SharedConstants),但 Minecraft 尚未初始化。 我们只需要初始化一下就能使注册表生效。 在你的 beforeAll 函数前简单地加入以下代码。
java
SharedConstants.tryDetectVersion();
Bootstrap.bootStrap();配置 GitHub Actions
INFO
本节假设您正在使用包含在示例模组和模组模板中的标准 GitHub Action 工作流。
你的测试现在将在每个构建上运行,包括由 GitHub Actions 等 CI 提供商构建的构建。 但是如果构建失败呢? 需要将日志作为工件上传,这样就可以查看测试报告了。
将下列文本添加进 .github/workflows/build.yaml 文件中 ./gradlew build 步骤的下方。
yaml
- name: Store reports
  if: failure()
  uses: actions/upload-artifact@v4
  with:
    name: reports
    path: |
      **/build/reports/
**/build/test-results/游戏测试
Minecraft 提供了用于测试服务器端功能的游戏测试框架。 Fabric 还提供客户端游戏测试来测试客户端功能,类似于端到端测试。
使用 Fabric Loom 设置游戏测试
服务器和客户端游戏测试都可以手动设置或使用 Fabric Loom 设置。 本指南将使用 Loom。
要将游戏测试添加到你的模组,请将以下内容添加到你的 build.gradle:
gradle
fabricApi {
	configureTests {
		createSourceSet = true
		modId = "example-mod-test-${project.name}"
		enableGameTests = true // Default is true
		enableClientGameTests = true // Default is true
		eula = true // By setting this to true, you agree to the Minecraft EULA.
	}
}要查看所有可用选项,请参阅 Loom 测试文档。
设置游戏测试目录
INFO
如果你启用了 createSourceSet,则仅需要此部分,推荐这样做。 当然,你也可以自己编写 Gradle 代码,但你需要自行承担所有风险。
如果你像上面的示例一样启用了 createSourceSet,那么你的游戏测试将位于单独的源集中,并带有单独的 fabric.mod.json。 模块名称默认为 gametest。 在 src/gametest/resources/ 中创建一个新的 fabric.mod.json,如下所示:
json
{
  "schemaVersion": 1,
  "id": "example-mod-test",
  "version": "1.0.0",
  "name": "Example mod",
  "icon": "assets/example-mod/icon.png",
  "environment": "*",
  "entrypoints": {
    "fabric-gametest": [
      "com.example.docs.ExampleModGameTest",
      "com.example.docs.entity.EntityAttributesGameTest"
    ],
    "fabric-client-gametest": ["com.example.docs.ExampleModClientGameTest"]
  }
}请注意,此 fabric.mod.json 需要在 src/gametest/java/com/example/docs/ExampleModGameTest 进行服务器游戏测试,并在 src/gametest/java/com/example/docs/ExampleModClientGameTest 进行客户端游戏测试。
编写游戏测试
你现在可以在 src/gametest/java 目录中创建服务器和客户端游戏测试。 以下是每个示例的基本示例:
java
package com.example.docs;

import java.lang.reflect.Method;

import net.minecraft.gametest.framework.GameTestHelper;
import net.minecraft.world.level.block.Blocks;

import net.fabricmc.fabric.api.gametest.v1.CustomTestMethodInvoker;
import net.fabricmc.fabric.api.gametest.v1.GameTest;

public class ExampleModGameTest implements CustomTestMethodInvoker {
	@GameTest
	public void test(GameTestHelper context) {
		context.assertBlockPresent(Blocks.AIR, 0, 0, 0);
		context.succeed();
	}

	@Override
	public void invokeTestMethod(GameTestHelper context, Method method) throws ReflectiveOperationException {
		context.setBlock(0, 0, 0, Blocks.AIR);
		method.invoke(this, context);
	}
}java
package com.example.docs;

import net.fabricmc.fabric.api.client.gametest.v1.FabricClientGameTest;
import net.fabricmc.fabric.api.client.gametest.v1.context.ClientGameTestContext;
import net.fabricmc.fabric.api.client.gametest.v1.context.TestSingleplayerContext;

@SuppressWarnings("UnstableApiUsage")
public class ExampleModClientGameTest implements FabricClientGameTest {
	@Override
	public void runTest(ClientGameTestContext context) {
		try (TestSingleplayerContext singleplayer = context.worldBuilder().create()) {
			singleplayer.getClientLevel().waitForChunksRender();
			context.takeScreenshot("example-mod-singleplayer-test");
		}
	}
}有关详细信息,请参阅 Fabric API 中的相应 Javadoc。
运行游戏测试
服务器游戏测试将通过 Gradle 任务 build 自动运行。 你可以使用 Gradle 任务 runClientGameTest 运行客户端游戏测试。
在 GitHub Actions 上运行游戏测试
使用 build 的现有 GitHub Action 工作流将自动运行服务器游戏测试。 要使用 GitHub Actions 运行客户端游戏测试,请将以下代码片段添加到 build.gradle 文件,并将以下作业添加到你的工作流。 Gradle 代码片段将使用 Loom 的生产运行任务运行客户端游戏测试,该作业将在 CI 中执行生产运行任务。
WARNING
目前,由于网络同步器出现错误,游戏测试可能会在 GitHub Actions 上失败。 如果遇到此错误,你可以在生产运行任务声明中将 -Dfabric.client.gametest.disableNetworkSynchronizer=true 添加到 JVM 参数中。
gradle
dependencies {
  productionRuntimeMods "net.fabricmc.fabric-api:fabric-api:${fabricApiVersion}"
}

tasks.register("runProductionClientGameTest", net.fabricmc.loom.task.prod.ClientProductionRunTask) {
	jvmArgs.add("-Dfabric.client.gametest")
	// Whether to use XVFB to run the game, using a virtual framebuffer. This is useful for headless CI environments.
	// Defaults to true only on Linux and when the "CI" environment variable is set.
	// XVFB must be installed, on Debian-based systems you can install it with: `apt install xvfb`
	useXVFB = true
}yaml
client_game_test:
  runs-on: ubuntu-24.04
  steps:
    - uses: actions/checkout@v4
    - uses: actions/setup-java@v4
      with:
        distribution: temurin
        java-version: 25
    - run: ./gradlew runProductionClientGameTest
    - if: always()
      uses: actions/upload-artifact@v4
      with:
        path: build/run/clientGameTest/screenshots