


Creating Your First Block 26.1.2
Learn how to create your first custom block in Minecraft.
Blocks are the building blocks of Minecraft (no pun intended) - just like everything else in Minecraft, they're stored in registries.
Preparing Your Blocks Class
If you've completed the Creating Your First Item page, this process will feel extremely familiar - you will need to create a method that registers your block, and its block item.
You should put this method in a class called ModBlocks (or whatever you want to name it).
Mojang does something extremely similar like this with vanilla blocks; you can refer to the Blocks class to see how they do it.
java
public class ModBlocks {
	private static Block register(String name, Function<BlockBehaviour.Properties, Block> blockFactory, BlockBehaviour.Properties properties, boolean shouldRegisterItem) {
		// Create a registry key for the block
		ResourceKey<Block> blockKey = keyOfBlock(name);
		// Create the block instance
		Block block = blockFactory.apply(properties.setId(blockKey));

		// Sometimes, you may not want to register an item for the block.
		// Eg: if it's a technical block like `minecraft:moving_piston` or `minecraft:end_gateway`
		if (shouldRegisterItem) {
			// Items need to be registered with a different type of registry key, but the ID
			// can be the same.
			ResourceKey<Item> itemKey = keyOfItem(name);

			BlockItem blockItem = new BlockItem(block, new Item.Properties().setId(itemKey).useBlockDescriptionPrefix());
			Registry.register(BuiltInRegistries.ITEM, itemKey, blockItem);
		}

		return Registry.register(BuiltInRegistries.BLOCK, blockKey, block);
	}

	private static ResourceKey<Block> keyOfBlock(String name) {
		return ResourceKey.create(Registries.BLOCK, Identifier.fromNamespaceAndPath(ExampleMod.MOD_ID, name));
	}

	private static ResourceKey<Item> keyOfItem(String name) {
		return ResourceKey.create(Registries.ITEM, Identifier.fromNamespaceAndPath(ExampleMod.MOD_ID, name));
	}
}Just like with items, you need to ensure that the class is loaded so that all static fields containing your block instances are initialized.
You can do this by creating a dummy initialize method, which can be called in your mod's initializer to trigger the static initialization.
INFO
If you are unaware of what static initialization is, it is the process of initializing static fields in a class. This is done when the class is loaded by the JVM, and is done before any instances of the class are created.
java
public class ModBlocks {
	public static void initialize() {
	}
}java
public class ExampleModBlocks implements ModInitializer {
	@Override
	public void onInitialize() {
		ModBlocks.initialize();
	}
}Creating And Registering Your Block
Similarly to items, blocks take a BlockBehaviour.Properties class in their constructor, which specifies properties about the block, such as its sound effects and mining level.
We will not cover all the options here: you can view the class yourself to see the various options, which should be self-explanatory.
For example purposes, we will be creating a simple block that has the properties of dirt, but is a different material.
- We create our block settings in a similar way to how we created item settings in the item tutorial.
- We tell the
registermethod to create aBlockinstance from the block settings by calling theBlockconstructor.
TIP
You can also use BlockBehaviour.Properties.ofFullCopy(BlockBehaviour block) to copy the settings of an existing block, in this case, we could have used Blocks.DIRT to copy the settings of dirt, but for example purposes we'll use the builder.
java
public static final Block CONDENSED_DIRT = register(
		"condensed_dirt",
		Block::new,
		BlockBehaviour.Properties.of().sound(SoundType.GRASS),
		true
);To automatically create the block item, we can pass true to the shouldRegisterItem parameter of the register method we created in the previous step.
Adding Your Block's Item to a Creative Tab
Since the BlockItem is automatically created and registered, to add it to a creative tab, you must use the Block.asItem() method to get the BlockItem instance.
For this example, we will add the block to the BUILDING_BLOCKS tab. To instead add the block to a custom creative tab, see Custom Creative Tabs.
java
CreativeModeTabEvents.modifyOutputEvent(CreativeModeTabs.BUILDING_BLOCKS).register((creativeTab) -> {
	creativeTab.accept(ModBlocks.CONDENSED_DIRT.asItem());
});You should place this within the initialize() function of your class.
You should now notice that your block is in the creative inventory, and can be placed in the world!
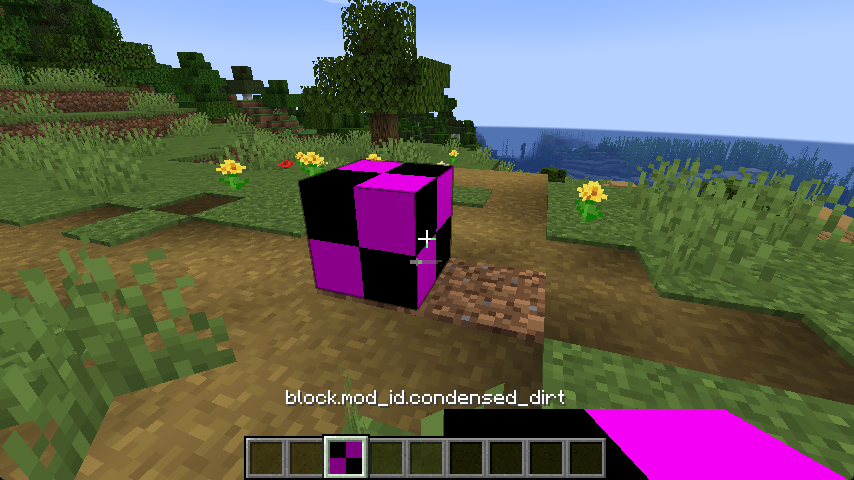
There are a few issues though - the block item is not named, and the block has no texture, block model or item model.
Adding Block Translations
To add a translation, you must create a translation key in your translation file - assets/example-mod/lang/en_us.json.
Minecraft will use this translation in the creative inventory and other places where the block name is displayed, such as command feedback.
json
{
  "block.example-mod.condensed_dirt": "Condensed Dirt"
}You can either restart the game or build your mod and press F3+T to apply changes - and you should see that the block has a name in the creative inventory and other places such as the statistics screen.
Models and Textures
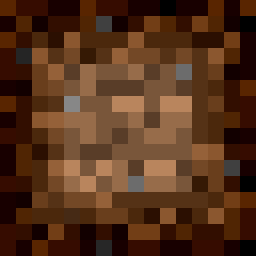
All block textures can be found in the assets/example-mod/textures/block folder - an example texture for the "Condensed Dirt" block is free to use.
To make the texture show up in-game, you must create a block model which can be found in the assets/example-mod/models/block/condensed_dirt.json file for the "Condensed Dirt" block. For this block, we're going to use the block/cube_all model type.
json
{
  "parent": "minecraft:block/cube_all",
  "textures": {
    "all": "example-mod:block/condensed_dirt"
  }
}For the block to show in your inventory, you will need to create a Client Item that points to your block model. For this example, the client item for the "Condensed Dirt" block can be found at assets/example-mod/items/condensed_dirt.json.
json
{
  "model": {
    "type": "minecraft:model",
    "model": "example-mod:block/condensed_dirt"
  }
}TIP
You only need to create a client item if you've registered a BlockItem along with your block!
When you load into the game, you may notice that the texture is still missing. This is because you need to add a blockstate definition.
Creating the Block State Definition
The blockstate definition is used to instruct the game on which model to render based on the current state of the block.
For the example block, which doesn't have a complex blockstate, only one entry is needed in the definition.
This file should be located in the assets/example-mod/blockstates folder, and its name should match the block ID used when registering your block in the ModBlocks class. For instance, if the block ID is condensed_dirt, the file should be named condensed_dirt.json.
json
{
  "variants": {
    "": {
      "model": "example-mod:block/condensed_dirt"
    }
  }
}TIP
Blockstates are incredibly complex, which is why they will be covered next in their own separate page.
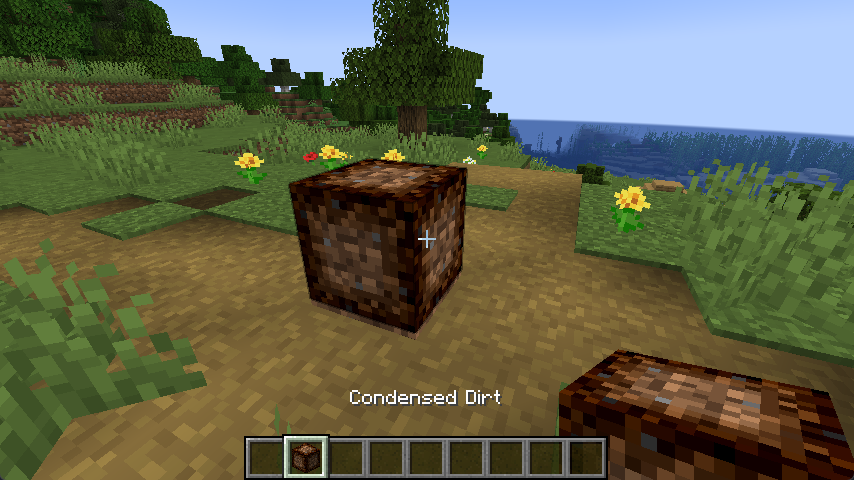
Restarting the game, or reloading via F3+T to apply changes - you should be able to see the block texture in the inventory and physically in the world:
Adding Block Drops
When breaking the block in survival, you may see that the block does not drop - you might want this functionality, however to make your block drop as an item on break you must implement its loot table - the loot table file should be placed in the data/example-mod/loot_table/blocks/ folder.
INFO
For a greater understanding of loot tables, you can refer to the Minecraft Wiki - Loot Tables page.
json
{
  "type": "minecraft:block",
  "pools": [
    {
      "rolls": 1,
      "entries": [
        {
          "type": "minecraft:item",
          "name": "example-mod:condensed_dirt"
        }
      ],
      "conditions": [
        {
          "condition": "minecraft:survives_explosion"
        }
      ]
    }
  ]
}This loot table provides a single item drop of the block item when the block is broken, and when it is blown up by an explosion.
Recommending a Harvesting Tool
You may also want your block to be harvestable only by a specific tool - for example, you may want to make your block faster to harvest with a shovel.
All the tool tags should be placed in the data/minecraft/tags/block/mineable/ folder - where the name of the file depends on the type of tool used, one of the following:
hoe.jsonaxe.jsonpickaxe.jsonshovel.json
The contents of the file are quite simple - it is a list of items that should be added to the tag.
This example adds the "Condensed Dirt" block to the shovel tag.
json
{
  "replace": false,
  "values": ["example-mod:condensed_dirt"]
}If you wish for a tool to be required to mine the block, you'll want to append .requiresCorrectToolForDrops() to your block settings, as well as add the appropriate mining level tag.
Mining Levels
Similarly, the mining level tag can be found in the data/minecraft/tags/block/ folder, and respects the following format:
needs_stone_tool.json- A minimum level of stone toolsneeds_iron_tool.json- A minimum level of iron toolsneeds_diamond_tool.json- A minimum level of diamond tools.
The file has the same format as the harvesting tool file - a list of items to be added to the tag.
Extra Notes
If you're adding multiple blocks to your mod, you may want to consider using Data Generation to automate the process of creating block and item models, blockstate definitions, and loot tables.