Armor provides the player with increased defense against attacks from mobs and other players.
Creating an Armor Materials Class
Technically, you don't need a dedicated class for your armor material, but it's good practice anyways with the number of static fields you will need.
For this example, we'll create a GuiditeArmorMaterial class to store our static fields.
Base Durability
This constant will be used in the Item.Properties#maxDamage(int damageValue) method when creating our armor items, it is also required as a parameter in the ArmorMaterial constructor when we create our ArmorMaterial object later.
java
public static final int BASE_DURABILITY = 15;1
If you're struggling to determine a balanced base durability, you can refer to the vanilla armor material instances found in the ArmorMaterials interface.
Equipment Asset Registry Key
Even though we don't have to register our ArmorMaterial to any registries, it's generally good practice to store any registry keys as constants, as the game will use this to find the relevant textures for our armor.
java
public static final ResourceKey<EquipmentAsset> GUIDITE_ARMOR_MATERIAL_KEY = ResourceKey.create(EquipmentAssets.ROOT_ID, Identifier.fromNamespaceAndPath(ExampleMod.MOD_ID, "guidite"));1
We will pass this to the ArmorMaterial constructor later.
ArmorMaterial Instance
To create our material, we need to create a new instance of the ArmorMaterial record, the base durability and material registry key constants will be used here.
java
public static final ArmorMaterial INSTANCE = new ArmorMaterial(
		BASE_DURABILITY,
		Map.of(
				ArmorType.HELMET, 3,
				ArmorType.CHESTPLATE, 8,
				ArmorType.LEGGINGS, 6,
				ArmorType.BOOTS, 3
		),
		5,
		SoundEvents.ARMOR_EQUIP_IRON,
		0.0F,
		0.0F,
		REPAIRS_GUIDITE_ARMOR,
		GUIDITE_ARMOR_MATERIAL_KEY
);
1
2
3
4
5
6
7
8
9
10
11
12
13
14
15
2
3
4
5
6
7
8
9
10
11
12
13
14
15
The ArmorMaterial constructor accepts the following parameters, in this specific order:
| Parameter | Description |
|---|---|
durability | The base durability of all armor pieces, this is used when calculating the total durability of each individual armor piece that use this material. This should be the base durability constant you created earlier. |
defense | A map of EquipmentType (an enum representing each armor slot) to an integer value, which indicates the defense value of the material when used in the corresponding armor slot. |
enchantmentValue | The "enchantability" of armor items which use this material. |
equipSound | A registry entry of a sound event that is played when you equip a piece of armor which uses this material. For more information on sounds, check out the Custom Sounds page. |
toughness | A float value which represents the "toughness" attribute of the armor material - essentially how well the armor will absorb damage. |
knockbackResistance | A float value which represents the amount of knockback resistance the armor material grants the wearer. |
repairIngredient | An item tag that represents all items which can be used to repair the armor items of this material in an anvil. |
assetId | An EquipmentAsset registry key, this should be the equipment asset registry key constant you created earlier. |
We define the repair ingredient tag reference as follows:
java
public static final TagKey<Item> REPAIRS_GUIDITE_ARMOR = TagKey.create(BuiltInRegistries.ITEM.key(), Identifier.fromNamespaceAndPath(ExampleMod.MOD_ID, "repairs_guidite_armor"));1
If you're struggling to determine values for any of the parameters, you can consult the vanilla ArmorMaterial instances which can be found in the ArmorMaterials interface.
Creating the Armor Items
Now that you've registered the material, you can create the armor items in your ModItems class:
Obviously, an armor set doesn't need every type to be satisfied, you can have a set with just boots, or leggings etc. - the vanilla turtle shell helmet is a good example of an armor set with missing slots.
Unlike ToolMaterial, ArmorMaterial does not store any information about the durability of items. For this reason the base durability needs to be manually added to the armor items' Item.Properties when registering them.
This is achieved by passing the BASE_DURABILITY constant we created previously into the maxDamage method in the Item.Properties class.
java
public static final Item GUIDITE_HELMET = register(
		"guidite_helmet",
		Item::new,
		new Item.Properties().humanoidArmor(GuiditeArmorMaterial.INSTANCE, ArmorType.HELMET)
				.durability(ArmorType.HELMET.getDurability(GuiditeArmorMaterial.BASE_DURABILITY))
);
public static final Item GUIDITE_CHESTPLATE = register("guidite_chestplate",
		Item::new,
		new Item.Properties().humanoidArmor(GuiditeArmorMaterial.INSTANCE, ArmorType.CHESTPLATE)
				.durability(ArmorType.CHESTPLATE.getDurability(GuiditeArmorMaterial.BASE_DURABILITY))
);

public static final Item GUIDITE_LEGGINGS = register(
		"guidite_leggings",
		Item::new,
		new Item.Properties().humanoidArmor(GuiditeArmorMaterial.INSTANCE, ArmorType.LEGGINGS)
				.durability(ArmorType.LEGGINGS.getDurability(GuiditeArmorMaterial.BASE_DURABILITY))
);

public static final Item GUIDITE_BOOTS = register(
		"guidite_boots",
		Item::new,
		new Item.Properties().humanoidArmor(GuiditeArmorMaterial.INSTANCE, ArmorType.BOOTS)
				.durability(ArmorType.BOOTS.getDurability(GuiditeArmorMaterial.BASE_DURABILITY))
);
1
2
3
4
5
6
7
8
9
10
11
12
13
14
15
16
17
18
19
20
21
22
23
24
25
2
3
4
5
6
7
8
9
10
11
12
13
14
15
16
17
18
19
20
21
22
23
24
25
You will also need to add the items to a creative tab if you want them to be accessible from the creative inventory.
As with all items, you should create translation keys for them as well.
Textures and Models
You will need to create a set of textures for the items, and a set of textures for the actual armour when it's worn by a "humanoid" entity (players, zombies, skeletons, etc).
Item Textures and Model
These textures are no different to other items - you must create the textures, and create a generic generated item model - which was covered in the Creating Your First Item guide.
For example purposes, you may use the following textures and model JSON as a reference.
INFO
You will need model JSON files for all the items, not just the helmet, it's the same principle as other item models.
json
{
  "parent": "minecraft:item/generated",
  "textures": {
    "layer0": "example-mod:item/guidite_helmet"
  }
}
1
2
3
4
5
6
2
3
4
5
6
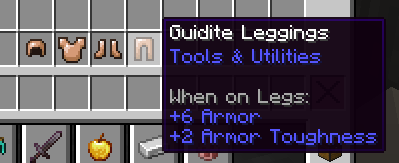
As you can see, in-game the armor items should have suitable models:

Armor Textures
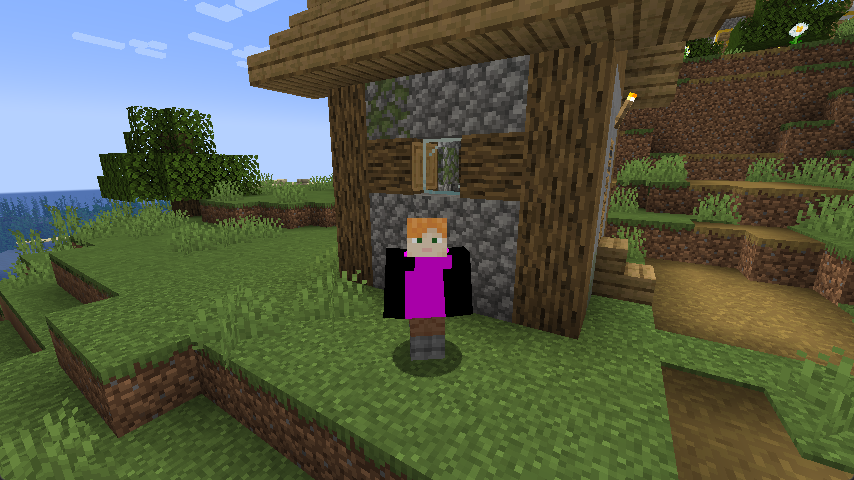
When an entity wears your armor, nothing will be shown. This is because you're missing textures and the equipment model definitions.

There are two layers for the armor texture, both must be present.
Previously, we created a ResourceKey<EquipmentAsset> constant called GUIDITE_ARMOR_MATERIAL_KEY which we passed into our ArmorMaterial constructor. It's recommended to name the texture similarly, so in our case, guidite.png
assets/example-mod/textures/entity/equipment/humanoid/guidite.png- Contains upper body and boot textures.assets/example-mod/textures/entity/equipment/humanoid_leggings/guidite.png- Contains legging textures.
TIP
If you're updating to 1.21.11 from an older version of the game, the humanoid folder is where your layer0.png armor texture goes, and the humanoid_leggings folder is where your layer1.png armor texture goes.
Next, you'll need to create an associated equipment model definition. These go in the /assets/example-mod/equipment/ folder.
The ResourceKey<EquipmentAsset> constant we created earlier will determine the name of the JSON file. In this case, it'll be guidite.json.
Since we only plan to add "humanoid" (helmet, chestplate, leggings, boots etc.) armor pieces, our equipment model definition will look like this:
json
{
  "layers": {
    "humanoid": [
      {
        "texture": "example-mod:guidite"
      }
    ],
    "humanoid_leggings": [
      {
        "texture": "example-mod:guidite"
      }
    ]
  }
}
1
2
3
4
5
6
7
8
9
10
11
12
13
14
2
3
4
5
6
7
8
9
10
11
12
13
14
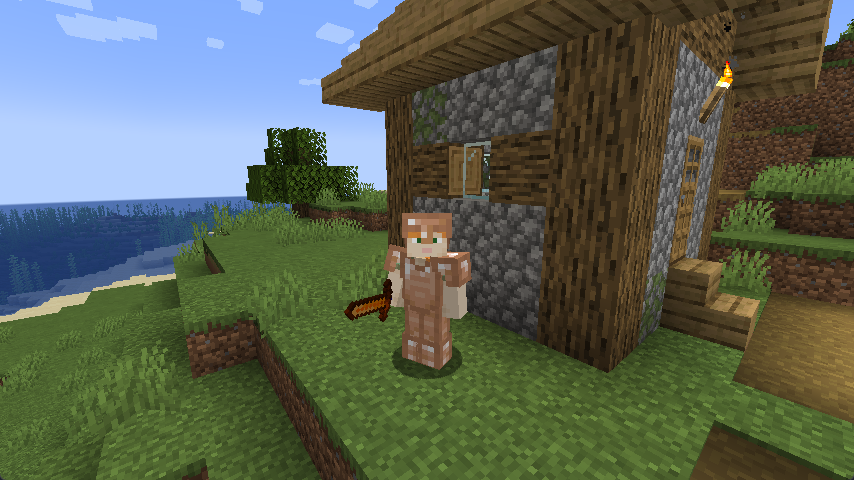
With the textures and equipment model definition present, you should be able to see your armor on entities that wear it:


