


Creating a Project 26.2
A step-by-step guide on how to create a new mod project using the Fabric template mod generator.
Fabric provides an easy way to create a new mod project using the Fabric Template Mod Generator - if you want, you can manually create a new project using the example mod repository, you should refer to the Manual Project Creation section.
Generating a Project
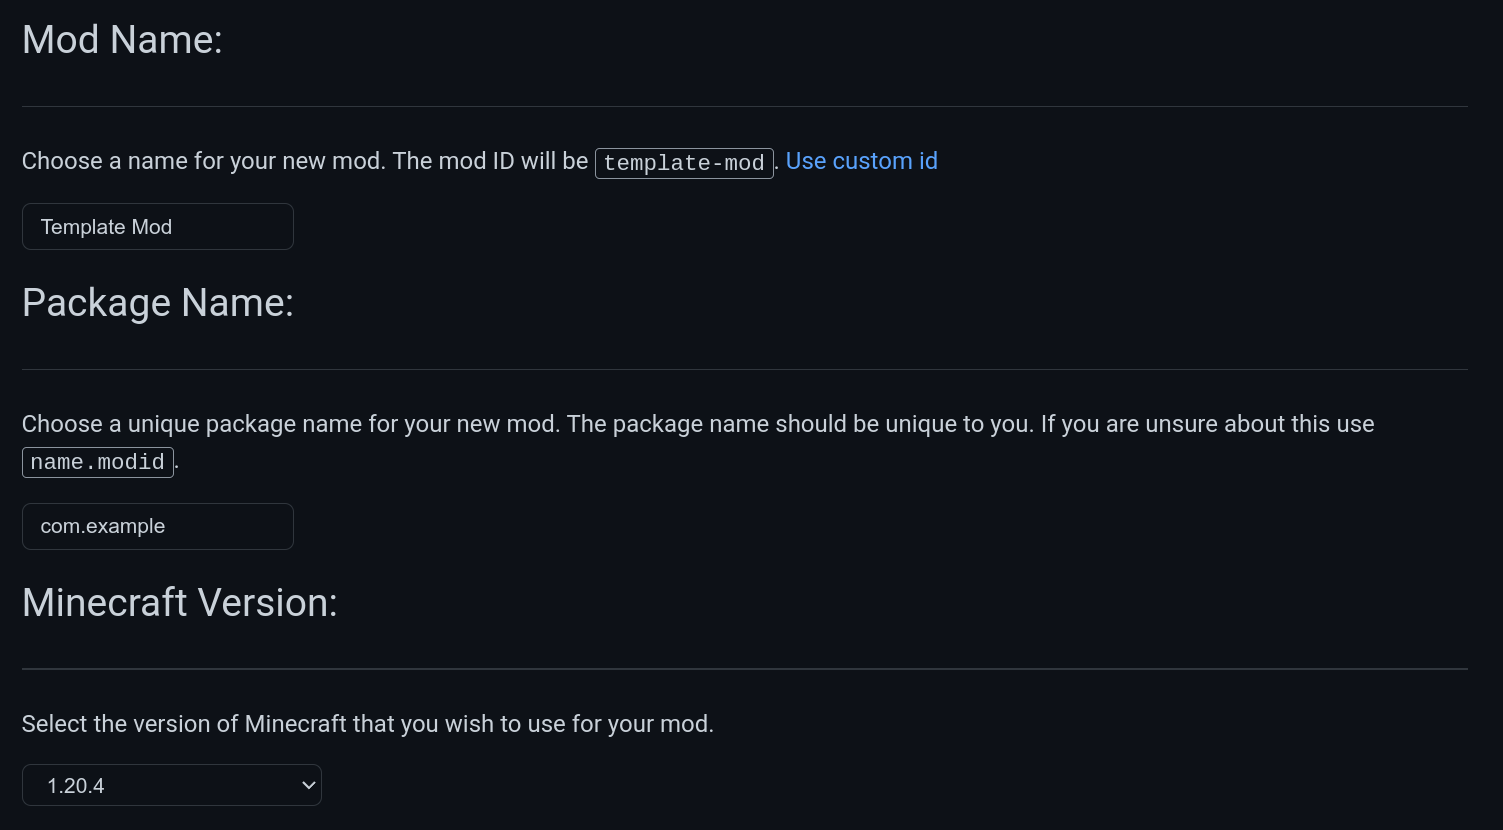
You can use the Fabric Template Mod Generator to generate a new project for your mod - you should fill in the required fields, such as the mod name, package name, and the Minecraft version that you want to develop for.
The package name should be lowercase, separated by dots, and unique to avoid conflicts with other programmers' packages. It is typically formatted as a reversed internet domain, such as com.example.example-mod.
IMPORTANT
Make sure you remember your mod's ID! Whenever you find example-mod in these docs, especially in file paths, you will have to replace it with your own.
For example, if your mod ID was my-cool-mod, instead of resources/assets/example-mod use resources/assets/my-cool-mod.
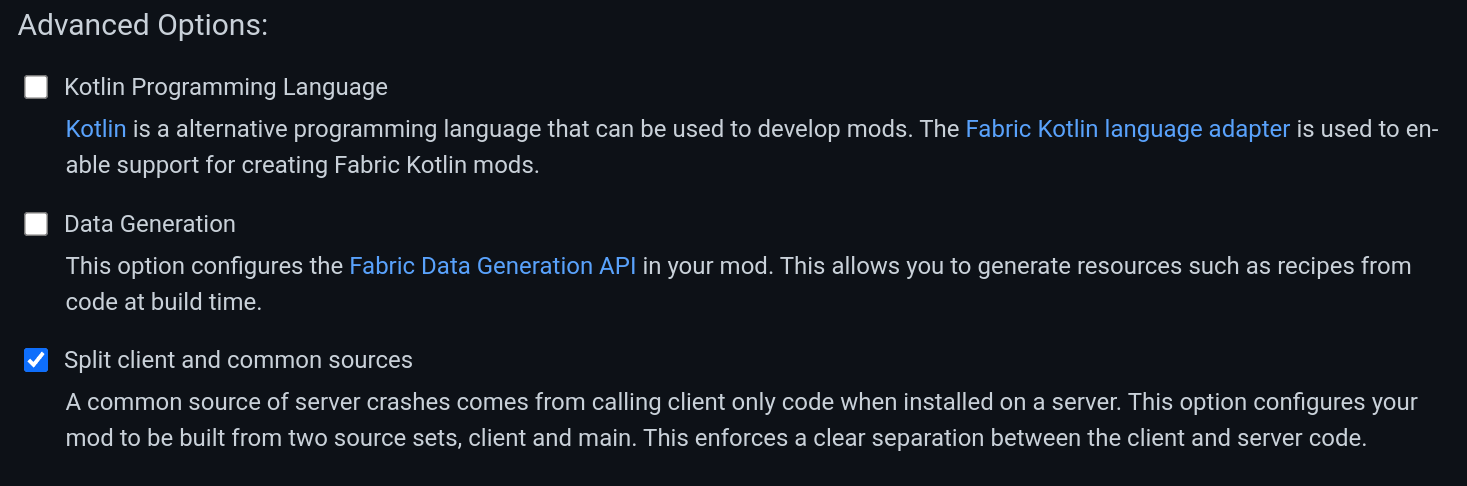
If you either want to use Kotlin, Kotlin buildscripts, or want to add data generators, you can select the appropriate options in the Advanced Options section.
INFO
Code examples given on this site use the names present in the unobfuscated game. If you have an existing mod that used mappings other than the ones provided by Mojang, please see our docs on Porting to 26.1 for more information.
Once you've filled in the required fields, click the Generate button, and the generator will create a new project for you to use in the form of a zip file.
You should extract this zip file to a location of your choice, and then open the extracted folder in your IDE.
TIP
You should follow these rules when choosing the path to your project:
- Avoid cloud storage directories (for example Microsoft OneDrive)
- Avoid non-ASCII characters (for example emoji, accented letters)
- Avoid spaces
An example of a "good" path may be: C:\Projects\YourProjectName
Manual Project Creation
PREREQUISITES
You will need Git installed in order to clone the example mod repository.
If you cannot use the Fabric Template Mod Generator, you can create a new project manually by following these steps.
Firstly, clone the example mod repository using Git:
sh
git clone https://github.com/FabricMC/fabric-example-mod.git example-modThis will clone the repository into a new folder called example-mod.
You should then delete the .git folder from the cloned repository, and then open the project. If the .git folder does not appear, you should enable the display of hidden files in your file manager.
Setting Up Your IDE
Once you've opened the project in your IDE, it should automatically load the project's Gradle configuration and perform the necessary setup tasks.
If you receive a notification talking about a Gradle build script, you should click the Import Gradle Project button.
For more information, please check out the Setting Up Your IDE page.
Modifying the Template
Once the project has been imported, you should modify the project's details to match your mod's details:
- Modify the project's
gradle.propertiesfile to change themaven_groupandarchive_base_nameproperties to match your mod's details. - Modify the
fabric.mod.jsonfile to change theid,name, anddescriptionproperties to match your mod's details. - Make sure to update the versions of Minecraft, the mappings, the Loader and the Loom - all of which can be queried through the Develop site - to match the versions you wish to target.
You can then change the package name and the mod's main class to match your mod's details.